
Video Flyover Tour
-
Hole 1 | Par 4 | Handicap M:3 / W:9
288 358 397 421 433 This is one of the tougher holes on the course with trees left and right, a good drive is crucial! Playing 421 yards from the back tees, this hole can be a monster with an easterly wind so shake off the first tee jitters and hit a good drive. Depending on the drive, your approach shot can be anywhere from 100 to 200 yards to an elevated green with trouble everywhere but short. Take your par and run here!
-
Hole 2 | Par 4 | Handicap M:13 / W:11
257 307 351 365 375 Plays anywhere from 375 to 306 yards depending on the tee box and is a hole where a birdie should creep into your mind! The fairway is guarded with bunkers both left and right, both of which are roughly 100 yards out. With a good drive, you should be tasked with a shot of 60 to 160 yards, with a green guarded by a bunker short right. This hole can yield a lot of birdies but can also bring a double into play if you aren't careful!
-
Hole 3 | Par 4 | Handicap M:15 / W:13
271 306 347 358 397 You may be sensing a theme here, a tree lined tee shot! This hole can be stretched to 400 yards and a good drive is extremely important on this undulated hole. Taking a three-wood off the tee isn't a bad idea here, as there is a hazard to the right of the fairway, and tree line to the left! After you get past the tee shot, the approach is significantly uphill to a large green. Like hole 2, this hole can be a birdie hole but has been known to dish out a double as well.
-
Hole 4 | Par 5 | Handicap M:1 / W:1
466 518 541 579 607 The first par 5 on the course! It sounds like an awesome chance to make a birdie, but not so fast my friend! From the back tees, this hole plays all of 607, typically into a moderate to strong breeze! The tee shot is guarded with fairway bunkers to the left and right of the fairway. The long hitters can blow past the right bunker which is ideal but missing way left can cause a lost ball, not to mention out of bounds right! If you are gutsy, you can try to get home in two but the green is narrow and has bunkers guarding it like a hawk! The green slopes toward the middle and front making pin positions a premium for your chance at scoring on this beast of a par 5.
-
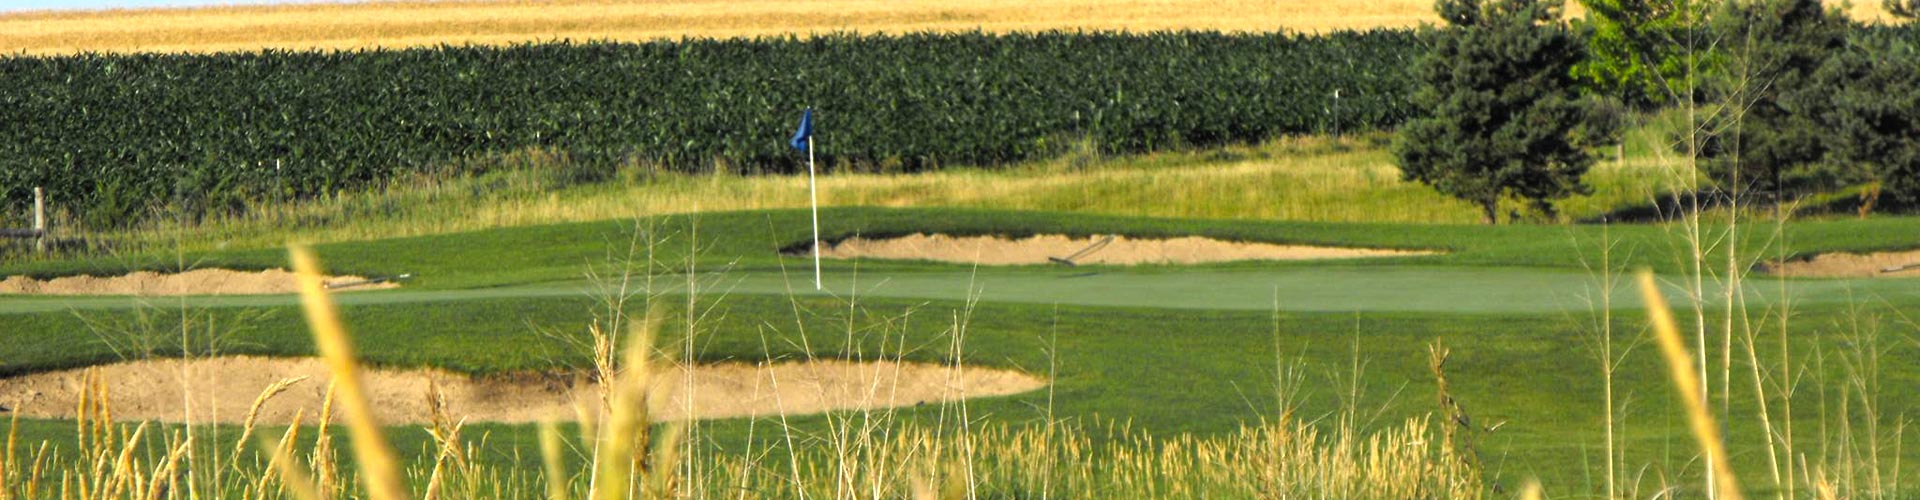
Hole 5 | Par 3 | Handicap M:17 / W:17
85 122 140 143 165 A par three! This hole is one that can be one of the easier ones on the course unless you try to get cute. It plays anywhere from 165 to 122, so the distance isn’t the issue, it’s the trouble that lurks short and long. Water guards the green short and bunkers long mean distance control is imperative. Your best bet is to play it safely towards the middle of the green, and make your par, unless you’re feeling gutsy!
-
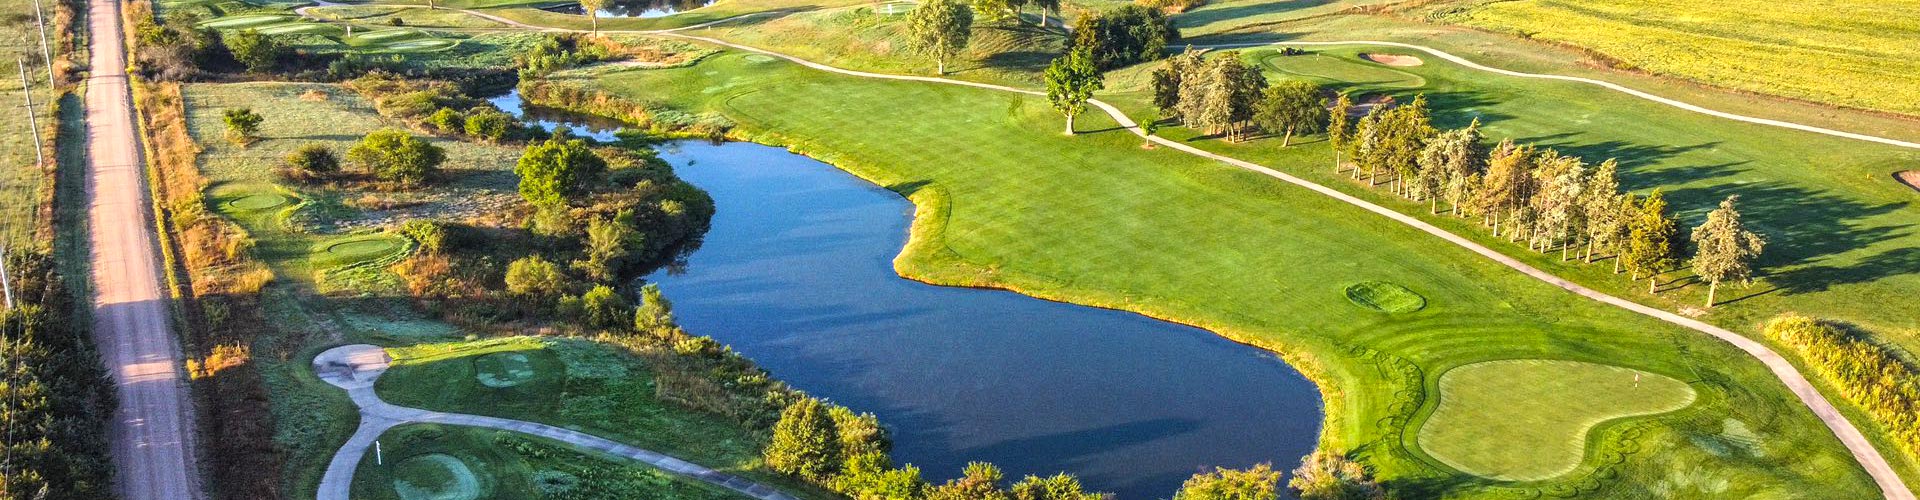
Hole 6 | Par 4 | Handicap M:9 / W:7
267 301 314 332 405 A true risk reward hole! For the long knocks, driving the green is possible but can come with consequences. A pond runs down the entire right side of the hole and pine trees down the left, not to mention the Buffalo Wallow in the middle of the fairway short of the green. Depending on the wind, this is a legit birdie opportunity but can also make you kick yourself! Laying up on this to 100 to 150 yards on this hole would be your best bet.
-
Hole 7 | Par 4 | Handicap M:5 / W:5
269 362 368 386 475 Arguably the toughest hole on the entire course! It’s the number 5 handicap hole but don’t let that fool you. Plays a daunting 475 from the back tees, to 362 from the forward tees. To the right is a County Road which is out of bounds and to the left is Tall Fescue that has been known to munch on a few golf balls. After your tee shots lands, hopefully safely, the approach shot is guarded by bunkers to the left and short, with Fescue beyond the green. Making a par on this hole could win you a skin!
-
Hole 8 | Par 3 | Handicap M:11 / W:15
148 183 200 209 225 An uphill par three that is a brute! Quite possibly the hardest par three on the course that plays all of 225 from the back tees and as easy as 183 from the front tees. Danger is looming to the right of this hole as trees and gnarly rough can make for a tough up and down that goes without talking about the grass bunkers! Like hole 7, a par on this will feel like a birdie!
-
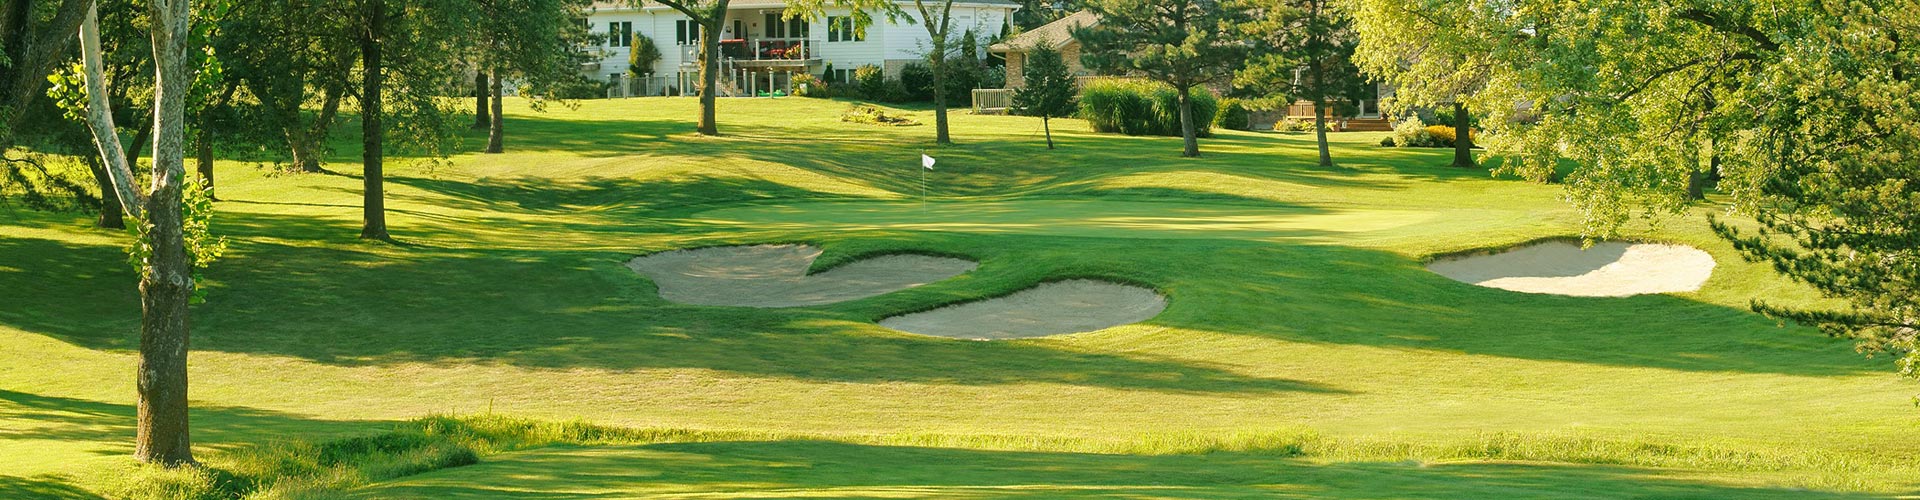
Hole 9 | Par 5 | Handicap M:7 / W:3
424 450 464 478 488 The last hole on the front nine is a par 5 and it may be the easiest as well. If you can put a nice drive into the fairway, it’s reachable in two. If that’s not your thing, laying up to 100 yards is a rather easy task! The green has got trouble all around it though with five bunkers making for a tough approach shot. Once you navigate around those, everything else is a walk in the park, except the green has got some subtle breaks that add an extra element. Chalk this up as one of the easiest on the course.
-
Hole 10 | Par 4 | Handicap M:10 / W:6
287 365 394 417 428 This par 4 is the tightest driving hole on the course. With trees immediately to the left of the tee and to the right, navigating through the forest is the toughest aspect of this hole. After you get past the trees, the approach shot is a remotely simple one but does have danger. Short of the green is a pond that guards the right half as does a bunker! This is a challenging hole but is one that can see some birdies as well.
-
Hole 11 | Par 3 | Handicap M:18 / W:18
122 131 163 179 206 The first par three on the back nine and can play 206 yards from the Black Tees, and 131 from the White Tees. Regarded as the easiest on the course, at least in terms of the handicap, the green has trees galore surrounding it but doesn't have much effect on the hole, unless the hole is tucked on the left side. With a creek, and bunkers short, make sure you hit enough club to carry those and you should be able to walk away from this hole with a par!
-
Hole 12 | Par 4 | Handicap M:8 / W:8
252 330 366 384 397 The first hole on the course where a lay-up is needed for sure! This par 4 plays 397 from the back tees, and 330 from the forward tees. Laying up to 150 yards is the best bet to ensure you have an open shot to the green. The green has three bunkers around it, two on the backside and one on the right but be aware, the fairway slopes to the left so shots can find their way to the left of the green and make for a treacherous up and down.
-
Hole 13 | Par 4 | Handicap M:12 / W:12
266 320 364 400 423 Like most holes, there is no bail out on the tee shot! All the way down the right side are trees, as is the left side, along with a creek that runs through a majority of the hole. Ideally, a tee shot on the right side of the fairway would be best, leaving an approach shot that doesn't have tree trouble but don't be short! The creek runs short of the green, and the green also has two bunkers placed on both sides of the green. To make matters worse, the green may be the toughest on the course as a huge mound is in the middle.
-
Hole 14 | Par 5 | Handicap M:6 / W:4
450 464 486 516 529 The first par five on the back nine and it measures 529 yards from the back tees. The distance isn't the challenge on this hole, it;s the chance of having a unfavorable lie that makes people lay-up. Fairway bunkers are plenty on this hole, as are greenside bunkers as well! After your tee shot, the second shot can be another risk reward but with out of bounds left, the ideal bail out would be right, leaving a fairly simple up and down.
-
Hole 15 | Par 3 | Handicap M:16 / W:16
161 167 178 200 221 The last par three on the course! This hole plays similar to number 8, as the hole is uphill and using at least a club more is a good idea. This is a pretty straight forward par three that has trouble surrounding the green, with two greenside bunkers. Trouble lurks to the left and right if you go a little off target, and depending on the wind, are possible spots as well. My advice, hit it towards the middle of the green and make par!
-
Hole 16 | Par 5 | Handicap M:2 / W:2
447 449 519 531 539 The last par five on the course, and one of the more odd tee shots! There aren't any trees to worry about, but we do have Fescue on both sides of the fairway, so hitting an accurate tee shot is a premium. P.S. Aim further left than maybe you think, the fairway bunker in site is a good target! The second shot can leave the long hitters with a tough decision, as it's reachable in two but takes some good accuracy. The second shot will be over a pond that shows no mercy so make sure you have enough club to reach the green, but greenside bunkers all around the green can make it tough to stay on the surface. If you decide to lay-up, a wedge to an 8-iron are the typical clubs hit into the green.
-
Hole 17 | Par 4 | Handicap M:14 / W:14
243 309 324 400 421 This hole can be daunting if you hit a cut, as water rides the entire right side of the hole. It measures 421 yards from the back tees and can be as short as 309, which is a drivable hole but is a big time risk! If you hit a good tee shot, your second shot will be into a green that is guarded by two bunkers and a pond to the right. This can be a birdie hole but can be a large number if you get a little squirrely off the tee!
-
Hole 18 | Par 4 | Handicap M:4 / W:10
316 384 404 417 435 Quite possibly the most challenging hole on the course, and one that can make close matches intriguing! The tee shot has no place to bail out as right is fescue, and to the left is out of bounds! The long hitters can take it over the trees, but the average golfers should try and hit a shot at the 200 yard marker with a cut. This will leave you with 170 yards into an elevated green with to the right of the green. If you can make it through this with a par, you are doing something right and have conquered the finishing hole at the Beatrice Country Club!